Use Build Definitions with Microsoft Team Services to sign and upload your apk
For our current project (an Android application) we use Microsoft Visual Studio Team Services. Mainly we use Team Services for source control and for sprint planning.
In this blog post I want to show how I set up my Build Definition for signing and storing the apk in a MSSQL database after a successful build.
No Google Play Store
We don’t publish our app on Google Play Store, only our employees use this app, so we integrated a custom update manager for our app. The apk from new releases are stored in our MSSQL database. Using a .Net Core Web API the android clients can check if there is a new version in the database and the custom update manager downloads and also installs the new version.
Create our Build Definition
Visual Studio Team Services provides a really good template for this scenario. I took the Xamarin.Android template and customised this template.
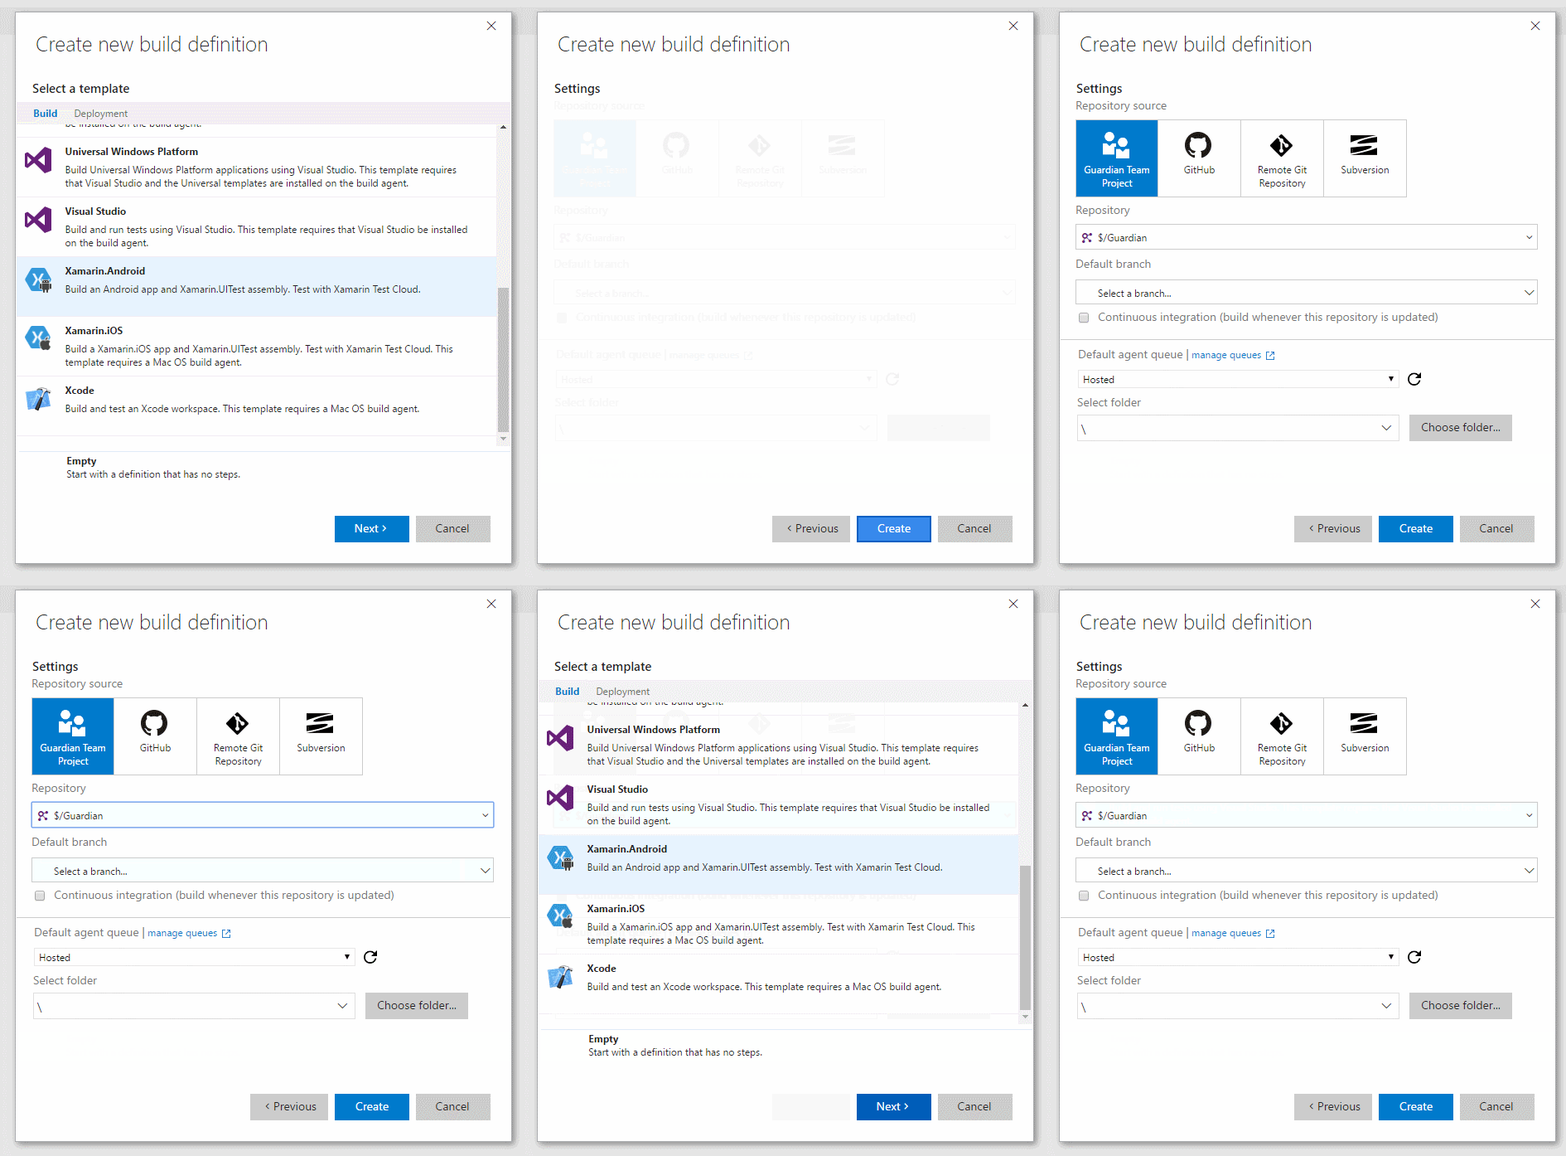
Now choose your project, your branch and your agent queue. You can choose between hosted agents or you also can easily create your own build agent on a machine which you use as build server. Also note the checkbox Continous integration (build whenever this repository is updated). If you toggle this checkbox, an automatic build is triggered whenever someone checks in at the chosen repository.
Now you have your new build definitio with these default build steps:
- NuGet restore */.sln
- This step searches all available solution files (every file ending with .sln) and restores all needed NuGet packages
- Xamarin component restore */.sln
- The same like the NuGet restore, but for Xamarin components
- Build Xamarin.Android Project */Droid*.csproj
- This step will build all projects with “Droid” in their name
- Build solution */test*.csproj
- This step will build all projects with “test” in their name
- Test
- This step will run your tests on the Xamarin Test Cloud
- Signing and aligning APK file(s)
- This step will sign your apk using your keytore file
- Publish Artifact: drop
- This step will publish your artifacts (dlls, apks, …)
You can get more details at the Team Services documentation at the section build.
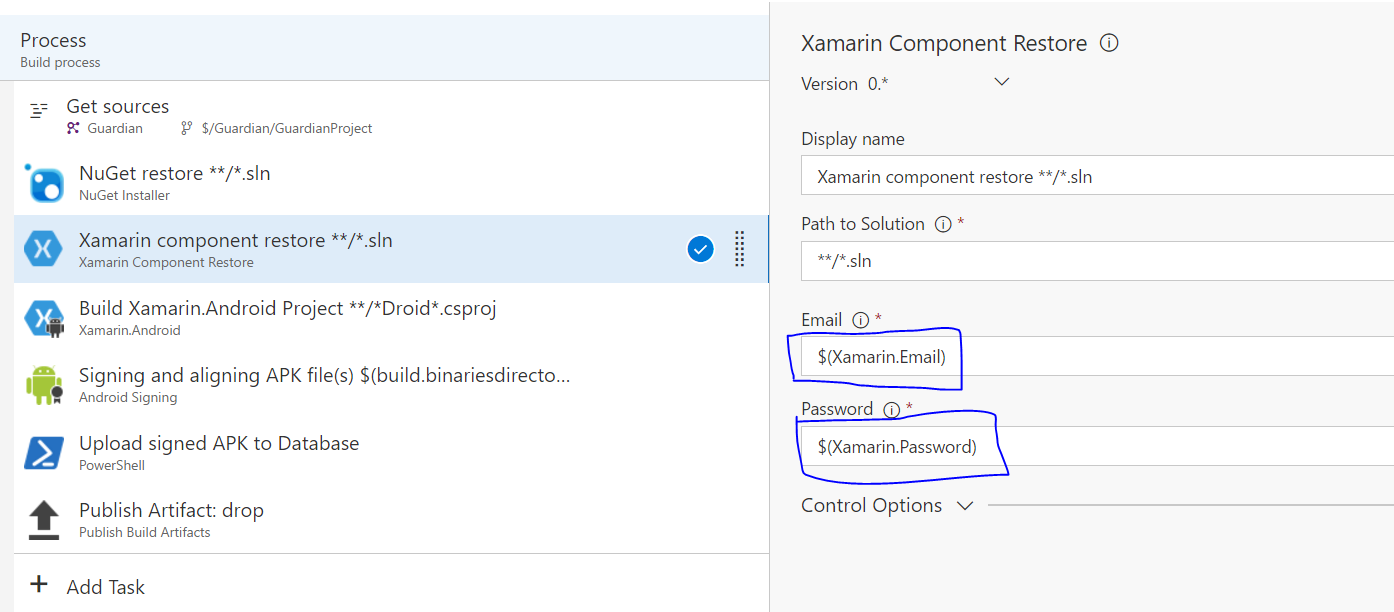
We add these two Variables which are needed for the Build process.
- xamarin.email
- The email adress of your xamarin account
- xamarin.password
- The password of your xamarin account
- For the password you can click on the icon to avoid exposing your password
To access a variable you have to write $(VARIABLENAME).
Step NuGet restore
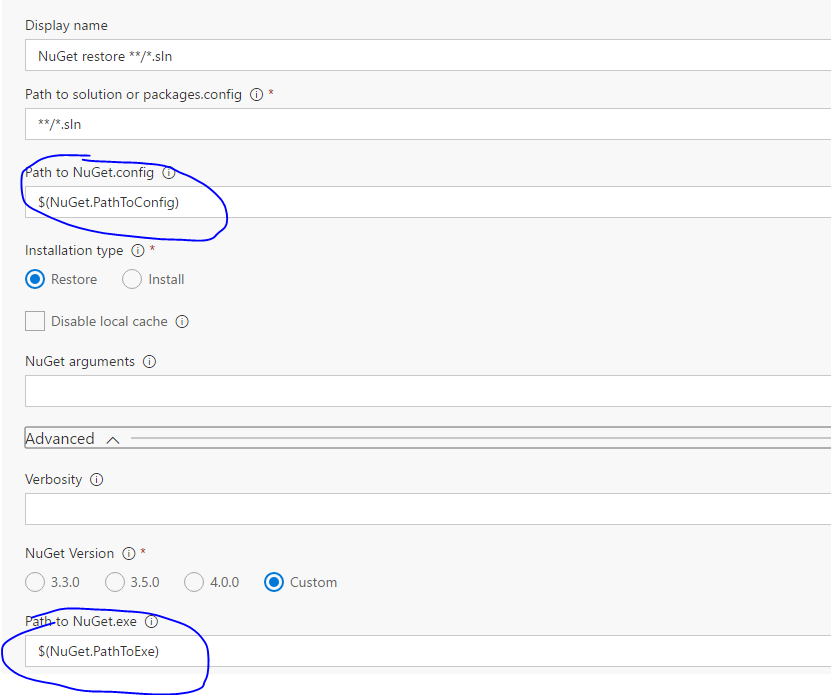
At the Advanced tab you can choose your NuGet version.
You can also provide a custom nuget.exe (NuGet download page).
You just have to provide the path to the NuGet.config file and the path to the nuget.exe within your repository.
- NuGet.PathToExe: $(Build.SourcesDirectory)\NuGet\nuget.exe
- NuGet.PathToConfig: $(Build.SourcesDirectory)\NuGet.config
To use your custom version of nuget.exe:
- download nuget.exe
- add it to your souce control
- I created a folder .nuget and placed the nuget.exe and NuGet.config here
- create variables including the path to the nuget.exe and to the NuGet.config
- add these variables to your build step NuGet restore
NuGet.config
<?xml version="1.0" encoding="utf-8"?>
<configuration>
  <packageSources>
    <add key="nuget.org" value="https://api.nuget.org/v3/index.json" />
  </packageSources>
  <solution>
    <add key="disableSourceControlIntegration" value="true" />
  </solution>
</configuration>
The source is the official nuget source and disableSourceControlIntegration just tells TFS not to include the restored packages automatically in the source control.
Xamarin component restore
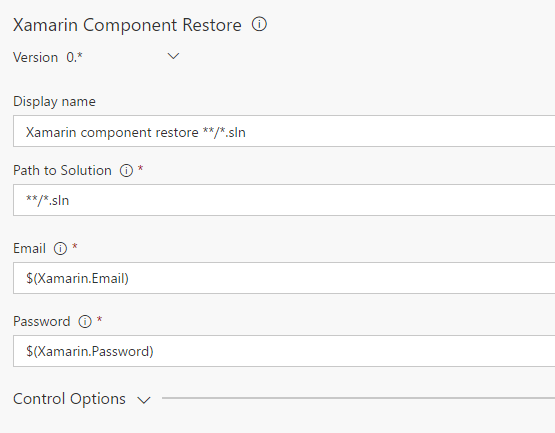
For this task you have to provide your email and your password for your xamarin account. We already created two variables containing these informations and can use these variables with $(xamarin.email) for the value of the required email textfield and $(xamarin.password) for the value of the required password textfield.
Build Xamarin.Android Project
This build step just searches for .csproj files with “Droid” in their name and compiles them. You can select the JDK version in the JDK Options tab.
Signing and aligning APK file(s)
For manual signing the apk read the post Manual Signing the APK on xamarin.com.
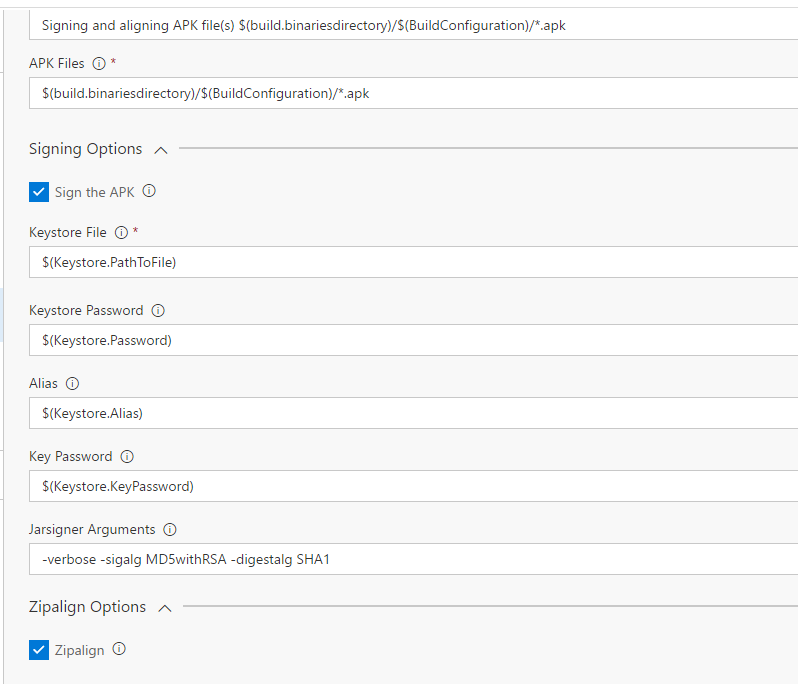
For signing you have to check Sign the APK in the Signing Options tab. Now you have to provide the following information:
- Keystore File
- Keystore Password
- Alias
- Key Password
Variables on VSTS:
- Keystore.PathToFile
- Keystore.Password
- Keystore.Alias
- Keystore.KeyPassword
For aligning you have to check Zipalign in the Zipalign Options.
Upload signed APK to database
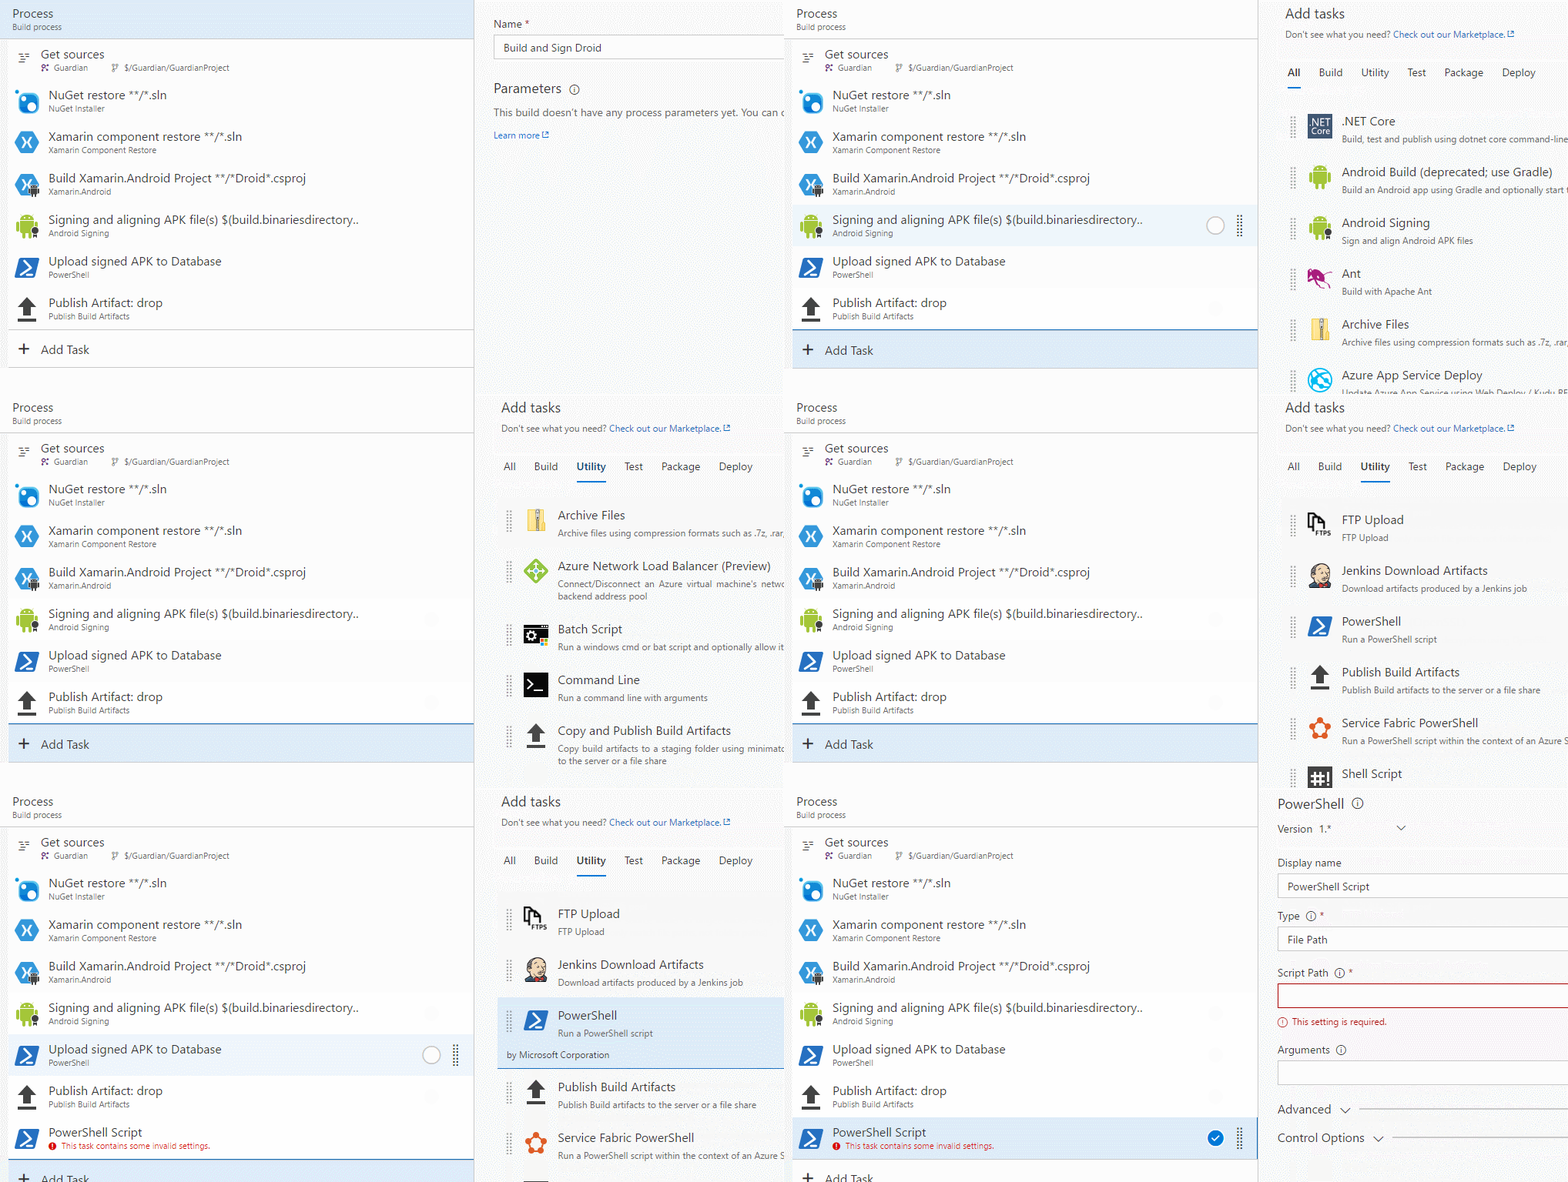
For uploading the signed and aligned APK file to our database I used a PowerShell script. So wee need a new build task to run a PowerShell script.
In the task tab you just have to click on Add Task, choose the tab Utility and there is an item called PowerShell.
Now you only have to provide the file path and the arguments for the PowerShell script.
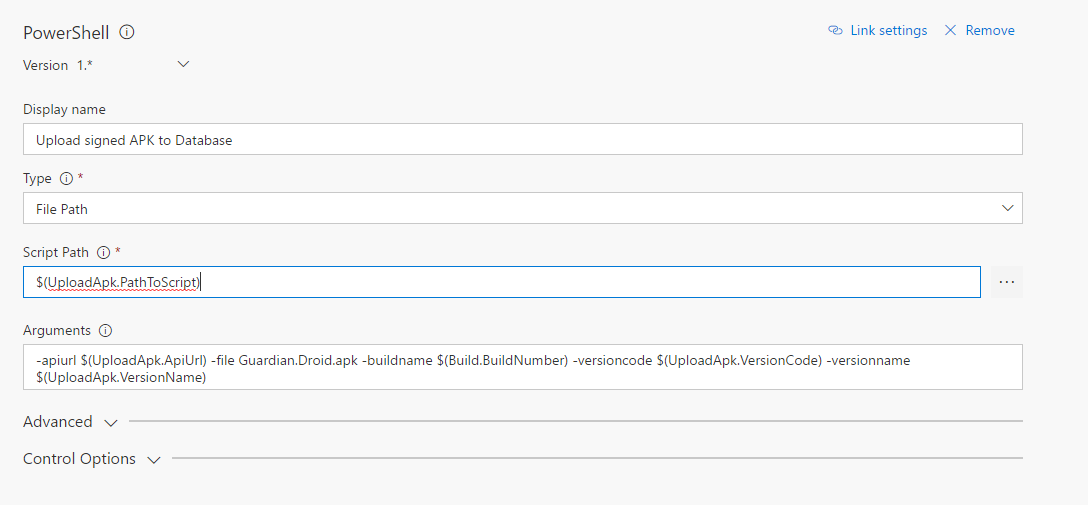
Add the following variables in the Variables tab
- UploadApk.PathToScript
- UploadApk.VersionCode (checked Settable at queue time)
- UploadApk.VersionName (checked Settable at queue time)
and checked Settable at queue time for the variables UploadApk.VersionCode and UploadApk.VersionName. With this option you will be asked for the value of these variables, if you trigger a new build. So with each new version you can specify the new version code and the new version name.
Here is the PowerShell script for uploading the apk to a database using an ASP.Net API.
Here is the code for ASP.Net API action for saving the apk file.
// PUT api/apk/
[HttpPut]
public void Put(Apk apk, IFormFile apkFile)
{
    var apkToInsert = new Apk()
    {
        VersionCode = apk.VersionCode,
        VersionName = apk.VersionName,
        BuildName = apk.BuildName,
        ApkContent = apkFile.ToBytes()
    };

    DbContext.Apks.Add(apkToInsert);

    DbContext.SaveChanges();
}
Publish Artifact
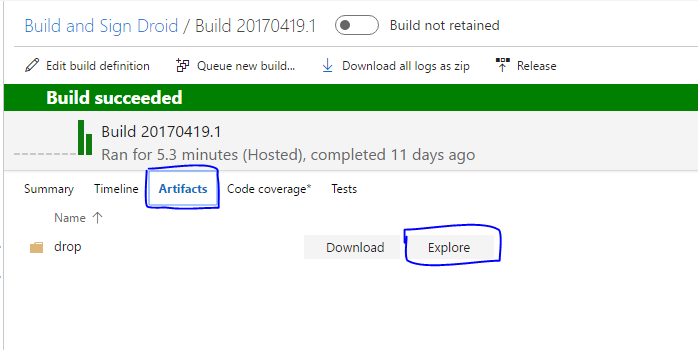
This task will just publish the created artifact (including all compiled files) and will save it at the succeeded build. You can access all these files after a successfull build.
